Building Apps (Legacy)
This is for the legacy platform, for the 2023 Refresh see:
Building Apps
Build your own Javascript & React apps that embed directly into the Flowgear Console to create rich user experiences.
Flowgear Apps are able to invoke native and Site-specific Flowgear API's via current users' security context. This permits the Web App to act as a pure front-end with virtually no business logic while Flowgear Workflows provide the business logic and data layers.
This article describes how to build and publish Flowgear Apps.
Requirements
NodeJS (available for download at https://nodejs.org/en/download/ ).
Visual Studio Code or other text editor.
Run the sample App
Clone the Flowgear Samples repository, then open custom-apps\sample-app in Visual Studio Code.
Run command
npm installvia the CMD or Terminal in the project directory (it may take some time as it will need to install packages).Please follow the README for instructions (flowgear-samples/README.md) on how to configure https for localhost to use for debugging the web app. This is required because the console is running in https and to debug the web app embedded in the console it is necessary that the app is also locally configured for https.
Run command
npm start(starts the development server)Open developer tools in the browser window that pops up and take note of the URL template shown in the warning message:
This Flowgear Web App should run embedded in the Console. Use the following URL to debug: https://my.flowgear.net/r/sites/{siteId}/apps/debug/?debugUrl=https%3A%2F%2Flocalhost%3A44305%2F
Copy the URL provided in to a new browser tab and replace
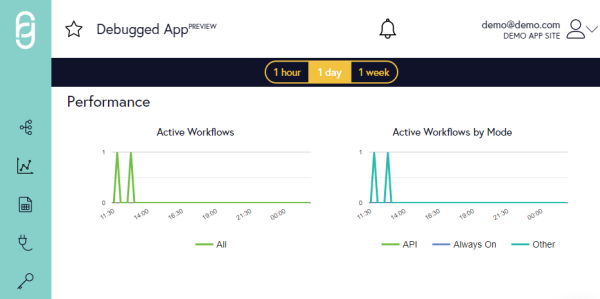
{siteId}with the ID of one of your Flowgear Sites.When that URL is opened, you should see a Dashboard app showing utilization metrics for the current Site.
Building your own App
We recommend building your own app by starting with the sample app but you can also start with a new react project.
If you're starting with a new project, first create a directory. Then run the following command to bootstrap a react app: npx create-react-app my-directory --typescript
and be sure to add the following line to the generated package.json file:
"homepage": "./"
To start with the sample application, clone it from https://github.com/Flowgear/flowgear-samples.
Note that only client-side code will be published so you are free to use a different IDE if desired.
Initializing the App
Open sample-app/src/index.js and add the following code before you instantiate the top-level React component:
Flowgear.Sdk.init();
Flowgear.Sdk.applyStylesheets();
Be sure to reference the SDK located at ./components/flowgearSdk by adding the following to the top of the file:
import { Flowgear } from './components/flowgearSdk';
This code initializes messaging between the App and the Console and then configures stylesheets so that the UI of your App is consistent with the Console.
Using the SDK
The SDK client library located at sample-app/src/components/flowgearSdk.tsx contains wrapper functions for all supported capabilities. The following functions are supported:
init()- called when your App initializes to configure the messaging interface with the ConsoleapplyStylesheets()- pulls in stylesheet definitions so that the UI of your App is consistent with the Consoleinvoke()- provides API calls in to Flowgear. This API is used to call native API's (for examplehttps://api.flowgear.net/users/{userId}/sites) as well as custom API's that have been published from workflows (for examplehttps://yourcompany.flowgear.net/someendpoint). You do not need to add authentication information, the SDK will automatically add it based on the context of the current user. Note that if you encounter a CORS (cross-origin resource sharing) error, ensure you've set the appropriate host in theAllowed Originsfield of the Site Detail Pane.getContext()- returns information about the current Console context including the current siteId, pod number and theme (default or dark theme)confirmModal()- displays a modal with a custom prompt that enables the user to confirm or cancel an actiongetTextModal()- displays a modal with a custom prompt that enables the user to input textsetAlert()- displays a standard Flowgear alert as either informational, warning or error. The alert can be configured to auto-hide or require explicit dismissalopenUrl()- opens the specified URL in a new browser tab
Debugging the App
Launch your project, on load a message will be written to the browser Console Window (typically accessed by opening Developer Tools in the browser):
This Flowgear Web App should run embedded in the Console. Use the following URL to debug: https://my.flowgear.net/r/sites/{siteId}/apps/debug/?debugUrl=https%3A%2F%2Flocalhost%3A44305%2F
Copy the URL provided in to a new browser tab and replace {siteId} with the ID of one of your Flowgear Sites. The App will then be able to load and the SDK will be functional.
Publishing your App
- Prepare your App for publishing by adding the file
app.jsonin to thesample-app/publicfolder.
Below is a specimen of the expected content of the file:
{
  "ManifestVersion": 1,  "Name": "SampleApp",  "Version": "1.0.0.0",  "DisplayName": "Sample App",  "EmbedMode": "menu",  "EmbedParameters": {    "After": "workflows"  }
}
ManifestVersionshould be set to1Nameshould contain a camel-case internal name for the App that is unique across Flowgear. Consider applying a namespace to this - for exampleyour-company.your-app. As this name must be unique across all tenants, you will need to change the name of the Sample App before you'll be able to publish itVersionshould be incremented each time the App is going to be published. It is not possible to re-publish the same version of an AppDisplayNamewill be presented as the name of the App in the front-end in both the Pane title area and in the menu (if the App is embedded into the menu)EmbedModeindicates how the App should embed into the Console. Currently this property can be left blank (user must know the URL to the app in order to open it) ormenuwhich indicates that the App will embed in to the left-hand menu.EmbedParametersspecifies parameters pertaining to theEmbedModeproperty. WhereEmbedModeis set tomenu, a parameter namedAftermay be specified. The value on this parameter indicates which menu item the App icon should embed after
Add an SVG icon named
icon.svgin to your publish root. This icon is used when the App is focused and also shown in the menu when the App is embedded in the menu.Obtain the App publish assets by running the command:
npm run buildNavigate to the publish location (the default location for the Sample App will be
sample-app/build).Zip the files in this location, then within Flowgear, click
SettingsandAppsfrom the left-hand menu.Click
+and choose the Flowgear Account you would like to publish the App through then upload the Zip file created earlier and clickSubmit.Once the App has published it will show up in the Apps list. Open the App by clicking it in the list.
On the right-hand pane, select and add the Sites you would like the App to be published to. Switch to the Site or refresh your Console in order for the App to embed.