Configuring Azure for Microsoft Graph Email Watcher
Describes the steps required to configure an Azure AD application for Office365 Inbox Monitoring
Introduction
In order to use the Microsoft Graph Email Watcher, one has to register an App with your organization in Azure. This document describes the steps to follow in-order to register the app, as well as how the registration relates to the email watcher node.
By the end of this process you should have
- A working application registration
- ClientId connection property
- TenantId connection property
- Base64Cert connection property
- CertPassword connection property
1 - Creating an App Registration
You will require an Azure administrator to perform the following actions. A person can be temporarily assigned the administrator role through Privileged Identity Management if needed.
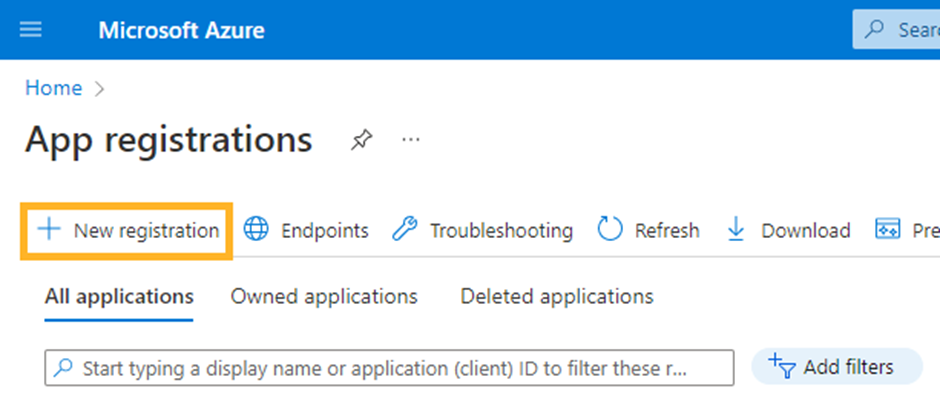
Sign in to the Azure Portal using your administrator account and navigate to App Registrations.
Click on "New Registration"
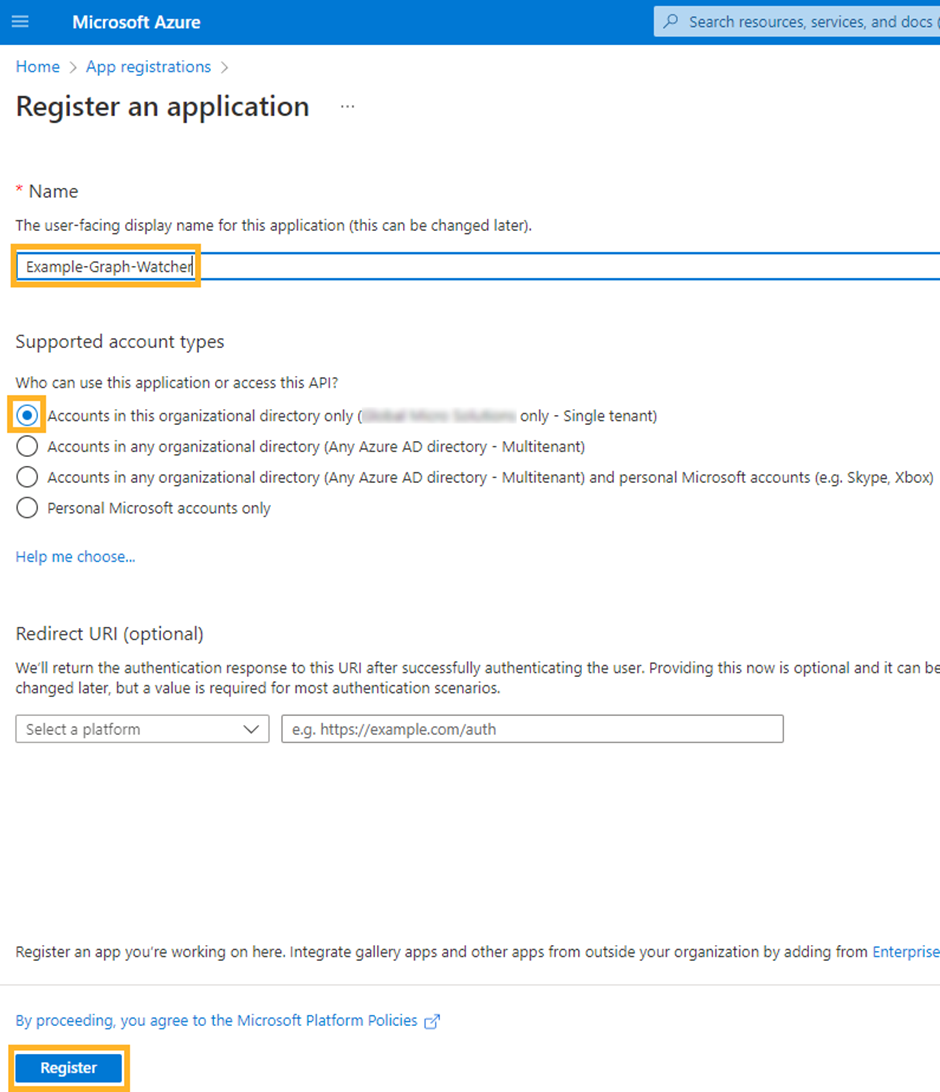
Provide the application with a descriptive name such as Flowgear MS Graph Connector - {YourCompanyName}
Select Accounts in this organizational directory only
Click on Register
2 - Granting API Permissions to your App
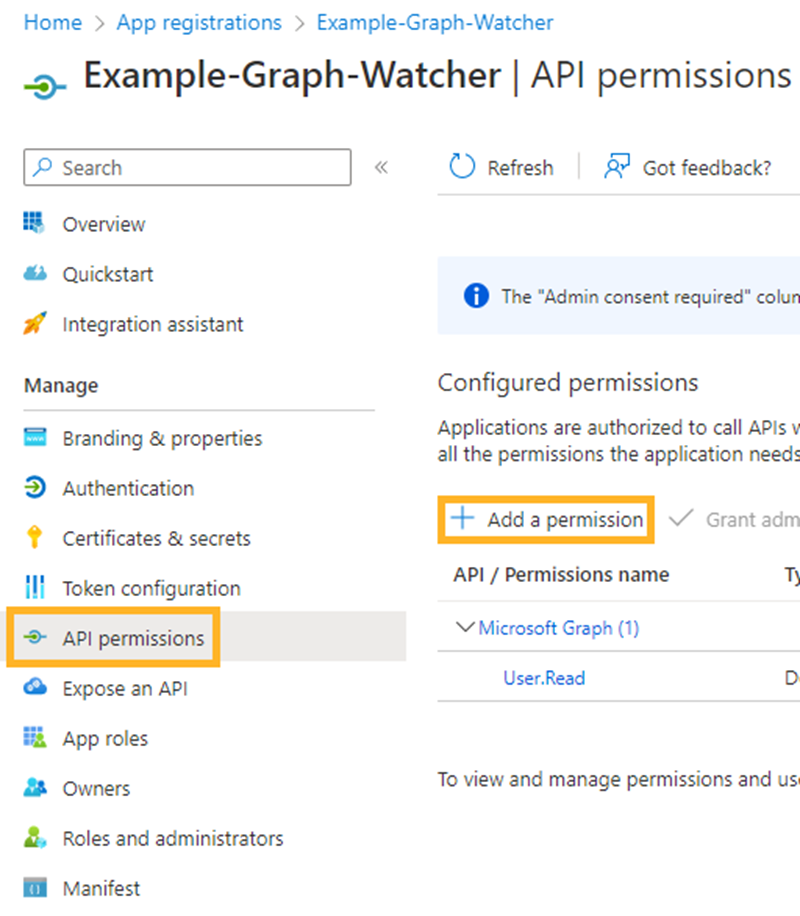
Select your newly created app and navigate to API permissions under the Manage tab.
Select Add a permission
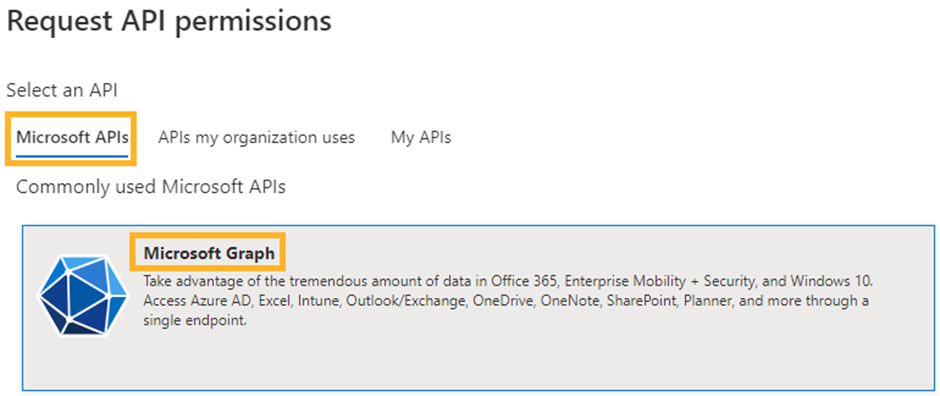
Select Microsoft APIs
Select Microsoft Graph
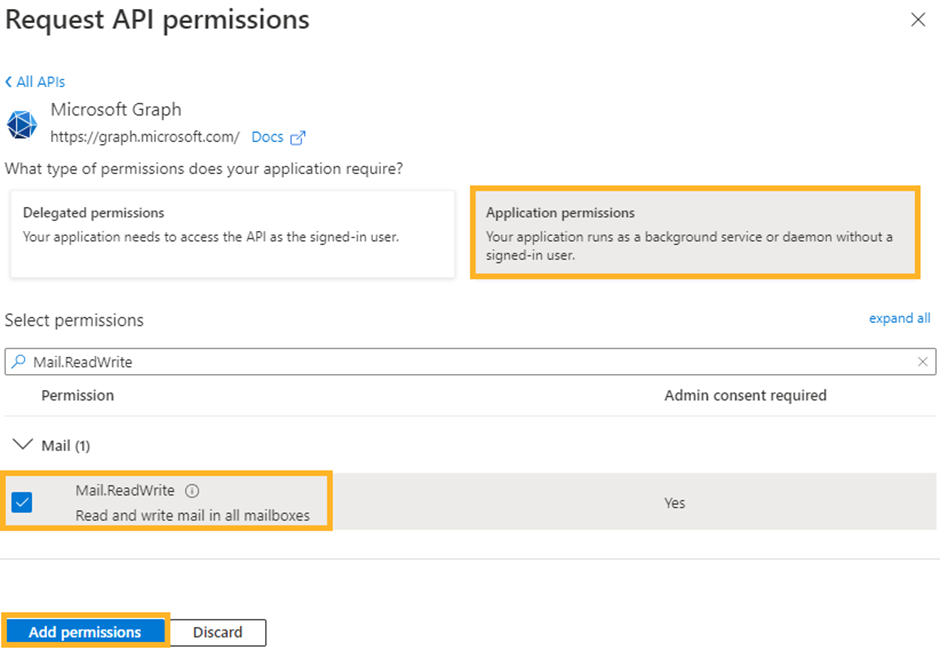
Select Application permissions
Search for the Mail.ReadWrite permission
Click on Add permissions
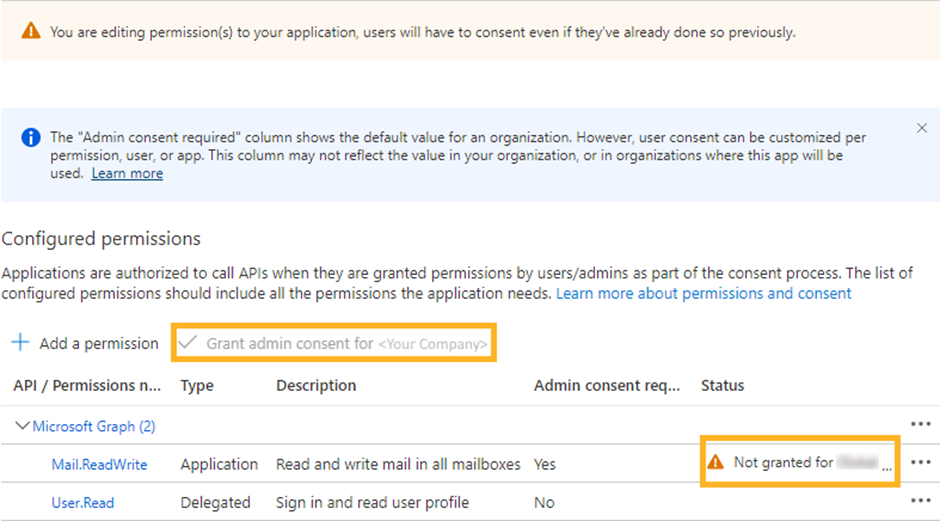
Click on Grant admin consent for <YourOrganization>
3 - Uploading your Certificate
Before you can use the new application, you will need to load a public key into the application. You will require an exported public key for this step. For more information around this process, see our help article:
Export a Public Key From a PFX File.
A self-signed certificate will be sufficient for this step. There are multiple ways to generate a self-signed, password-protected .PFX file. One such solution is through the use of OpenSSL.
Keep the .PFX file available, as this is supplied to the MS Graph Email Watcher's Base64Cert connection property as a Base64 encoded byte array. The .PFX file can be encoded using the following workflow:
See this Sample Workflow for an example of Base64-encoding a PFX file.
Steps 3.1 to 3.X assume that you have the public key ready for upload.
Navigate to Certificates & secrets under the Manage tab.
Select Upload certificate.
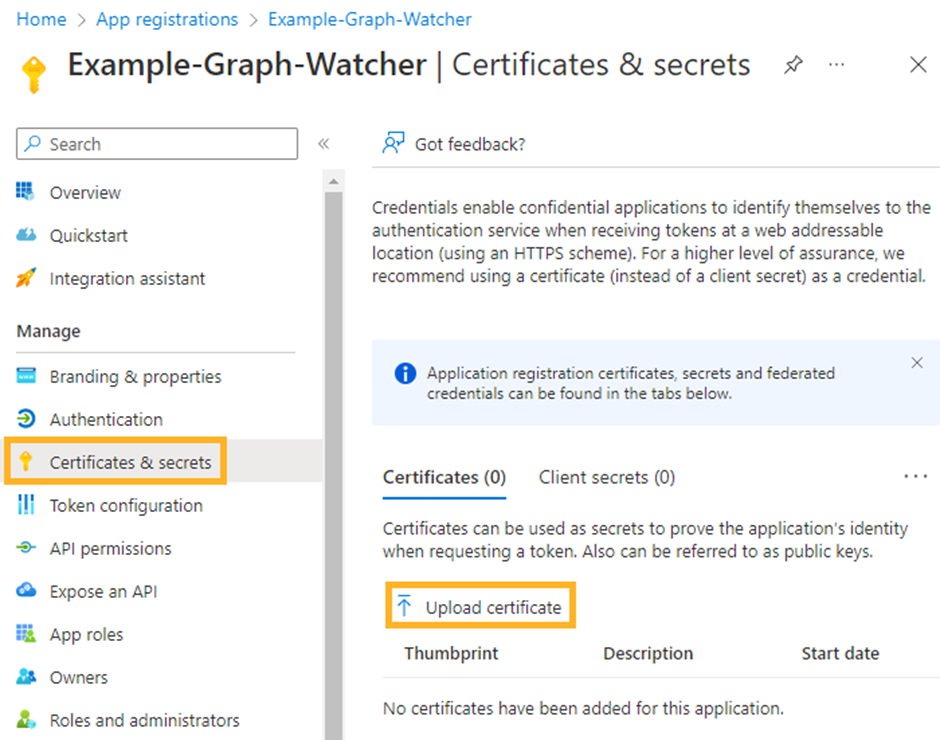
Provide the certificate public key (should be a .cer file), provide a description (for example the same as the certificate name) and upload the certificate.
4 - Scoping Permissions to a Specific Mailbox
Please note that without scoping the application to a specific mailbox, the application will be able to read and write mail information for every Active Directory Outlook user in the organization. The following steps are therefore vital from a security perspective. For additional context, please see Limiting application permissions to specific Exchange Online mailboxes.
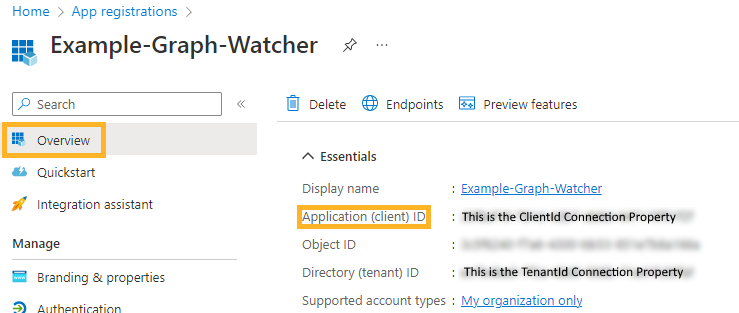
Before you begin, ensure that you have the monitoring email address that you will be monitoring, as well as the application identity. These can be found on the "Overview" tab of your application (see image below).
4.1 Installing Exchange Online Management
Before an administrator can limit the application scope, they must install Microsoft's Exchange Online Management module.
Open a new PowerShell terminal as administrator and install the module, then verify it's loaded:
Install-Module -Name ExchangeOnlineManagement
Import-Module ExchangeOnlineManagement
Get-Module ExchangeOnlineManagement
Enter y when prompted to install the NuGet provider.
Enter a to install the modules.
Enter a to run the software if prompted.
4.2 Connect to Exchange
Run the following from PowerShell to connect to Exchange Online:
Connect-ExchangeOnline
4.3 Setting Execution Policy
Should you encounter errors such as "you cannot run this script on the current system", you may need to set the execution policy to allow running non-digitally signed scripts. This can be reverted afterwards if needed.
Set the execution policy in your open PowerShell window
set-executionpolicy remotesigned
Enter y to change the execution policy.
4.4 Mailbox Access Tests
To verify that the access has been adequately restricted, we will perform the following actions:
Execute the following tests:
Test A: Test a mailbox that should be out of scope. This can be any email address in the organization that should not be monitorable by the app. The test should succeed before the restriction has been applied and fail after the restriction has been applied.
Replace the encapsulated fields with the appropriate properties.
Test-ApplicationAccessPolicy -Identity {OutOfScopeEmailAddress} -Appid {YourApplicationIdentity}
Test B: Test your monitoring mailbox. This should succeed before and after the restriction has been applied.
Test-ApplicationAccessPolicy -Identity {MonitoredEmailAddress} -Appid {YourApplicationIdentity}
Apply the restriction
New-ApplicationAccessPolicy -AppId {YourApplicationIdentity} -PolicyScopeGroupId {MonitoredEmailAddress} -AccessRight RestrictAccess -Description "Restrict this app to monitoring mailbox"
Repeat tests A and B and confirm expected results.
This should conclude the configuration process. Now you can fill the connection properties into the node and test the connection.